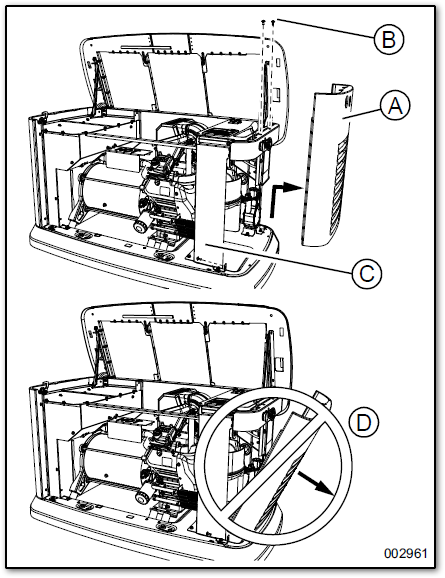
Intake side panel removal
Removing the side panel is required to access internal components that require regular maintenance such as the battery, fuel regulator, and sediment trap. It is also necessary to inspect the control panel wiring.
Note: Generac does NOT recommend end users attempt to modify or service internal generator wiring. Generac-certified dealers are trained to service Generac generators and can be contacted using the dealer lookup tool on Generac.com.
Environment
This article applies to Generac air-cooled home standby generators.
- If you have a Guardian Series generator, see here.
- If you have a Next Generation Series generator, see here.
1. Raise the lid and remove the front panel by lifting it straight up and out while the lid is opening.
2. Use a 4mm hex key to remove the two mounting screws (B) and L-bracket screws (C).
3. Lift the intake panel up and away from the generator.
Note: Always lift the intake side panel straight up before pulling away from the enclosure. Do not pull the panel away from the enclosure before lifting it up (D).

Removing intake side panel
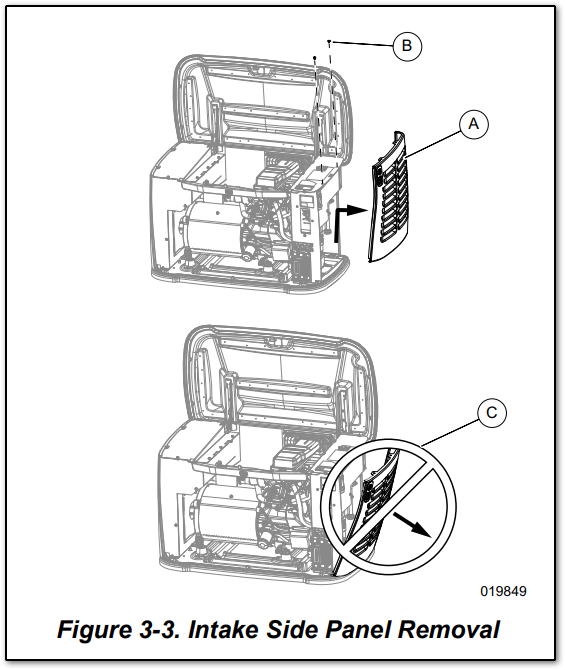
See Figure 3-3. Intake side panel (A) must be removed to access the battery compartment, dual shutoff valve, and sediment trap.
To remove the intake side panel:
- Raise the lid and remove the front panel.
- Use a T30 star bit to remove two mounting screws (B).
- Lift the intake panel up and away from the generator.
- Place the intake panel in a safe, flat area to prevent damage.

Note: Always lift the intake side panel straight up before pulling it away from the enclosure. Do not pull the panel away from the enclosure before lifting it up (C).


