Checking and changing the air filter
Generator owners should reference these articles before checking and changing the air filter:
Maintenance Schedule:
Maintenance Safety:
Maintenance Kits:
Authorized Service Dealers:
Consult the User Manual:
Environment
This article applies to:
- Generac Next Generation Series 10-28 kW air-cooled standby generators
- Generac Guardian Series 10-26 kW air-cooled standby generators (2017 to present)
Sections
1. Lift the lid and press the OFF button on the control panel to stop the generator. Then, remove the front panel.
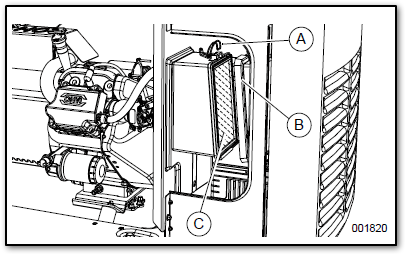
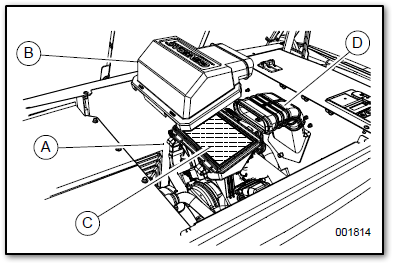
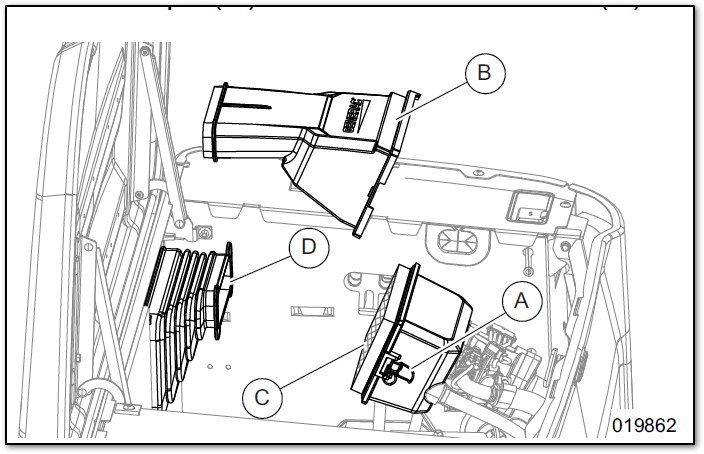
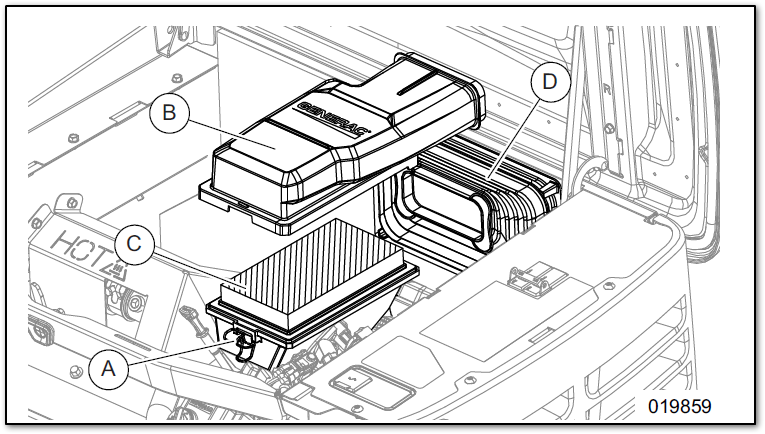
2. Remove cover clips (A) and air cleaner cover (B).
Air filter location (10 kW)

Air filter location (13–22 kW)

3. Remove the old air filter element (C) and discard it.
4. Thoroughly clean the air cleaner enclosure of any dust or debris.
5. Install a new air filter element.
6. Install air cleaner cover and fasten cover clips.
7. (13–22 kW units only): Verify air inlet duct (D) is correctly connected to the air cleaner cover.
8. Press the AUTO button on the control panel to return the unit to AUTO.
Proceed as follows to service the air cleaner:
- Unlock and lift the lid. Press the OFF button on the control panel to stop the generator.
- Remove the front panel.
- Release cover clips (A) and remove the air cleaner cover (B). See Figures 4-4 and 4-5.
4-4 Air cleaner location for 10 kW models

4-5 Air cleaner location for 14–28 kW models

- Remove the old air filter element (C) and discard it.
- Thoroughly clean the air cleaner enclosure of any dust or debris.
- Install a new air filter element.
- Reinstall the air cleaner cover and fasten the cover clips.
- Verify the air inlet duct (D) is correctly connected to the air cleaner cover.
- Press the AUTO button on the control panel to return the unit to AUTO mode.


