Read the manual thoroughly and understand all of the instructions, cautions, and warnings before using this equipment. If any section of the manual is not understood, contact your nearest authorized dealer, or contact Generac Customer Service at 1-888-436-3722 (1-888-GENERAC), or www.generac.com with any questions or concerns.
Servicing the spark plugs
Sections
Environment
This article applies to:
- Generac Next Generation Series 10–28 kW air-cooled standby generators
- Generac Guardian Series 10–26 kW air-cooled generators (2017 to present)
Owners should always reference the user manual for maintenance tasks. See How Do I Find a Copy of My Home Standby Generator Owner's Manual and Spec Sheets?.
Before you begin
Generator owners should reference these articles before servicing the spark plugs:
Next Generation air-cooled standby spark plug maintenance
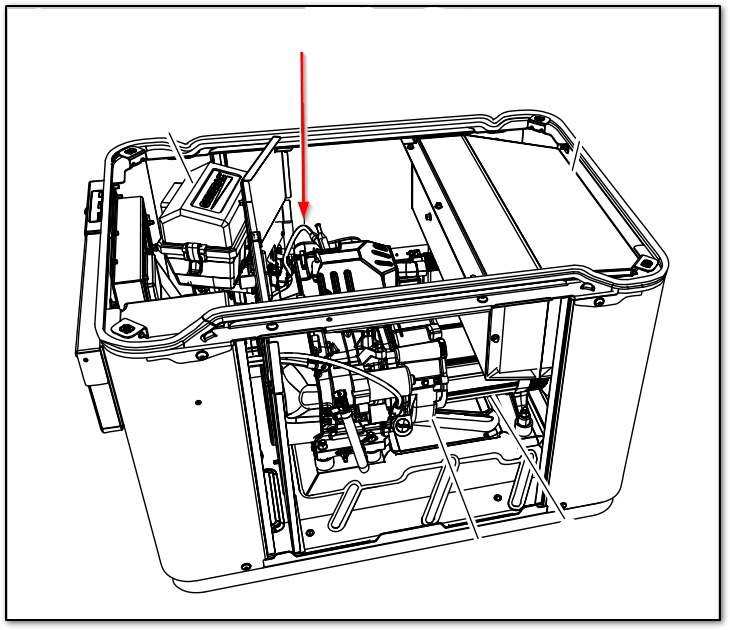
Removing the plastic air filter cover may be necessary to reach the spark plug in the back of the unit (filter cover is removed in the image below).
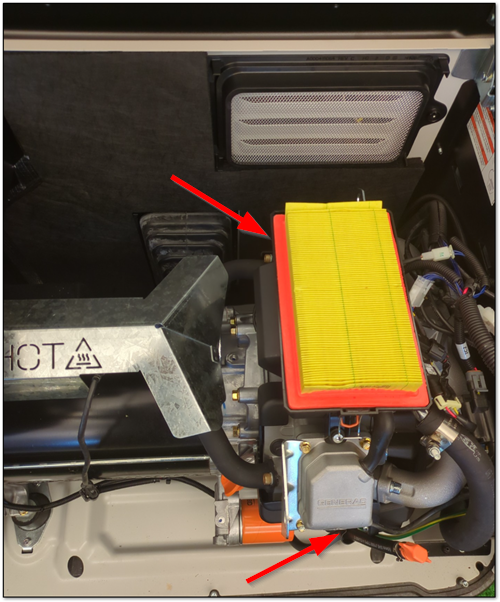
Front spark plug:
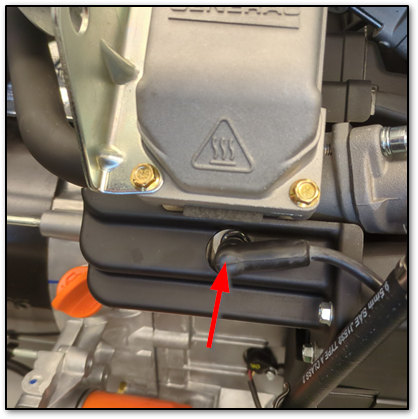
Rear spark plug:
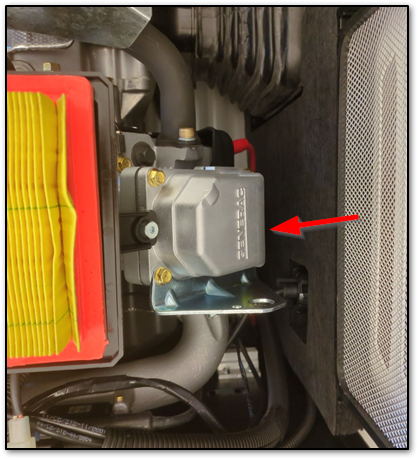
To inspect the spark plug gaps and replace spark plugs:
- With generator OFF and engine cool, lift lid and remove front panel.
- Clean area around base of spark plug(s) to keep dirt and debris out of engine.
Note: Clean and re-gap spark plug(s) in emergency situations only. Otherwise, replace spark plug(s).
- Remove spark plug(s) and inspect spark plug gap(s) using a wire feeler gauge. Replace spark plug(s) if spark plug gap is out of specification. For the spark plug part number, see your generator’s user manual on the product lookup page.
Note: New spark plug(s) should have spark plug gap checked prior to installation.
- Install spark plug(s), and tighten to 18.4 ft-lbs (25 Nm).
- Press the AUTO button to return the unit to AUTO mode.
Guardian series spark plug maintenance
Spark plug location
For all air-cooled V-twin 2-cylinder models, the spark plugs are located as shown below:
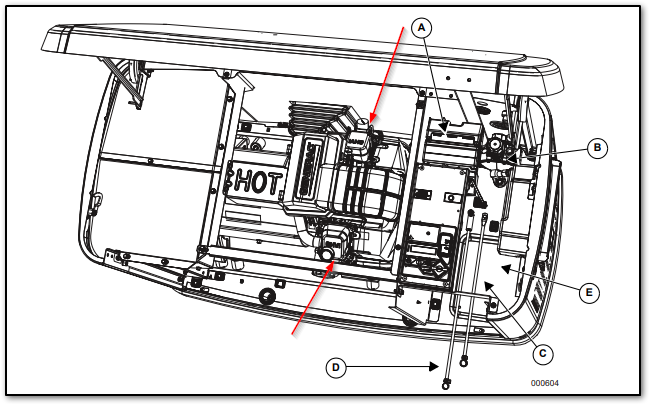
For all air-cooled single-cylinder models, the spark plug is located as shown below:
To inspect the spark plug gaps and replace spark plugs:
- With the generator OFF and the engine cool, lift the lid and remove the front panel.
- Clean the area around the base of the spark plug(s) to keep dirt and debris out of the engine.
- Remove and inspect the spark plug. Use a 3/8-inch ratchet with a 5/8-inch spark plug socket to remove the spark plug. Check the condition of the plug and replace it if worn or questionable. For the spark plug part number, see your generator’s user manual on the product lookup page.
- Clean plug(s) by scraping or washing with a wire brush and commercial solvent. Do not blast plug(s) to clean.
Note: Clean spark plug in emergency situations only. Otherwise, replace the spark plug.
- Inspect the spark plug gap using a wire feeler gauge. Replace the spark plug if the gap is out of specification. Engine information is found in the Specifications section of the generator’s user manual.
Note: New spark plugs should have spark plug gaps checked prior to installation.
- Install the spark plug(s), and tighten to 18.4 ft-lbs (25 Nm).
- Press the AUTO button to return the unit to AUTO mode.


